Good morning! Today I am happy to share with you a fun recipe–homemade apple butter! This recipe is super easy, and I know that if you’re as addicted to apple butter as I am, you’ll fall for it right away. The best part? It’s made in a slow-cooker, so you could prep this on Christmas Eve and have fresh apple butter for Christmas Day breakfast!
My apple butter escapade started out with a bright future. Becca and I spent a weekend afternoon developing a recipe from scratch, fully expecting it to be a bust. Instead, the apple butter was DELIGHTFUL. It was rich. It was creamy. It was flavorful. I proudly schmeared some onto toast every time someone came over and made them taste test it. It was getting rave reviews.

Then came the day to actually make my quadruple-magillion batch, to can and give as gifts for the Holiday. Here’s where my plans went wayward. You see, our test recipe used four apples and made about 24 ounces. My quadruple-magillion batch consisted of enough apples to fill thirty-six 8 ounce canning jars–that’s a lotta apples! So here I am chop chop chopping away, and I come to find that the number of apples I have chopped and seasoned (about half) won’t fit in my Crock Pot. Surprise! (Sometimes I can be a real dingbat…).
So what happens next? You guessed it. I strayed from the plan. I decide to take my apples, throw them in a stock pot and boil ’em down. I truly believe this method would have worked just fine had I actually paid attention to the apples. Instead, I went about working on my finals homework for school. After all, the original plan was to throw apples into a Crock Pot and let them have it for about 10 hours while I dutifully studied. Well, we all know the beauty of the slow-cooker is the ability to walk away from it for a whole day. Boiling fruit on the stove-top does not afford that same luxury.
I endeed scorching that apple mush an inch deep at the bottom of the pot.
Shamed, I reverted back to the original plan, only to discover another oversight: HOW WAS I GOING TO COOK 5, TEN-HOUR BATCHES IN ONE WEEKEND WITH ONE CROCK POT? The answer? I wasn’t!
So, Wes and I called around and rounded up an extra Crock Pot. I reduced the cook time (with much trepidation, mind you!) from 10 to 7 hours and hoped for the best.
It turned out just fine, especially since we also cut out the added sweetener (to accommodate sugar-free diets). But, I still think my very original recipe was the best:
HOMEMADE APPLE BUTTER
INGREDIENTS
2 Granny Smith apples
2 Fuji apples
1/4 teaspoon ground clove
2 tablespoons ground cinnamon
1 tablespoon lemon juice
a drizzle of honey
SUPPLIES
slow-cooker
immersion blender
strainer
canning supplies (if you’re planning on making a large batch and preserving***)
INSTRUCTIONS
Slice apples into sixteenths. Don’t get rid of the core/seeds–the pectin in the core will help thicken the apple butter! Toss apple slices into your slow-cooker, sprinkling with the clove, cinnamon, and lemon juice. Drizzle honey all over the top, cover with lid, and turn on low. Let those babies cook for a solid 10 hours. The apples will become dark brown, and will reduce a lot. Liquid will release and will boil. All of these things are good things. At the end of 10 hours, pour into a bowl and carefully immersion blend. Strain into a cute serving dish and smear on toast, pancakes, and waffles, or even use as a fruit dip!
***If you want to can your apple butter, the web is full of great tutorials on canning. Also, you can ask your awesome mama for tips, like me. Here’s my canning process:
1. Wash jars, lids, and rings in hot, soapy water, and rinse.
2. Boil jars, lids, and rings for about 10 minutes.
3. Remove jars from water with this handy tool. Be sure to set jars onto clean towels, right side up. Avoid touching the lip of the jar to anything. Leave lids and rings in hot water until ready to seal jars.
4. I used this fancy-dancy food press to strain my apple butter into a clean bowl. Or you could use this two-in-one strainer/funnel to funnel strained apple butter right into the jar!
5. Otherwise, use a regular funnel to transfer the strained apple butter into jars. I must stress the usage of the funnel. It’s important to keep the lip of the jar sterile, so dripping apple butter all over it and constantly wiping it off is not the best practice!
6. Leave room in the top of the jar for the contents to expand when boiling during the sealing process. For me, this meant I filled until just below the threads on the jar.
7. Use tongs to fish out your lids and rings. First the lid…place it evenly onto your jar, and follow with a ring.
8. Use a pot like this to give your cans a water-bath. The rack holds your cans off of the burner. I heated the water first, added the cans, and then turned it up to boiling. I processed my cans for 10 minutes. This processing time can vary depending on what you’re canning (jams/jellies, veggies, etc.) and also by your elevation. A Google search can always offer more information!
9. Remove your cans from the water with your can grabber, and allow to cool over night. This is my FAVORITE PART! If you’ve processed the cans correctly, you’ll start to hear little “pops” as the vacuum action seals the lids to the jar. Our cans popped all through the night, and every time, either myself or Wes would wake up and say “Oooh! Another one!” I was very nervous my jars wouldn’t seal!
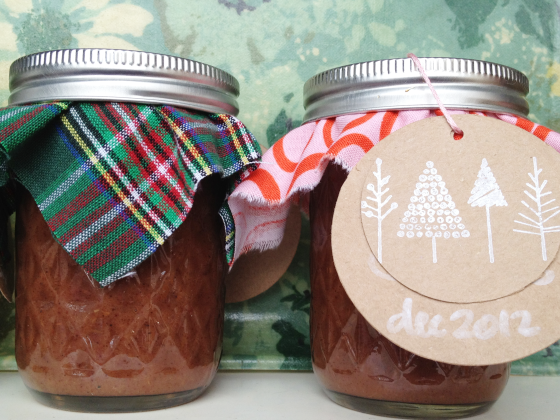
10. Some people promote storing the jars without rings, because trapped water can cause the lid to rust or harbor bacteria (bad). I just chose to remove the rings after the jar had sealed, wipe off any water, and package with my squares of material and gift tags. Super cute, right?

I hope you find this apple butter tasty! And, Happy Holidays. We’ll be signing off until after the holidays for the most part, so have fun and stay warm!
xoxo,
Catherine