Hello!
The two of us have had so much fun decorating for the holidays this year! Here’s a secret for you: not even a week into November we drug out our decorations and hung them up, just to see how well everything went together.
It’s a very good thing we did because we were able to see the whole picture and determine if we needed any extra thingamabobs or doodads to complete our wintery scene.
Which, as it turns out, we did. And thus, we have embarked on numerous holiday projects and bring you the first part of our Handmade Holiday 2012 series: a winter wreath!
We knew that a wreath would help tie everything together, but we didn’t want to go out and buy a wreath from a craft store. Those tend to be rather expensive (not to mention contrary to our general style) and we’re both on a budget.
So, we decided we had to make one and whipped up this lovely Winter Holiday Wreath. And good news: we spent around $25 for supplies. That means more Holiday Budget to go around (and around and around and around . . . so many gifts to make/buy/bake)!
Here are the directions for a simple wreath that you can tailor to fit your style and general trimmings and trappings this season.
Supplies:
one Styrofoam form
two bags of fluffy feathers
hot glue gun/sticks
material in a neutral color (we already had this on hand, so it’s not included in our Projected Project Price!)
accent branches or other baubles
coordinating wide ribbon
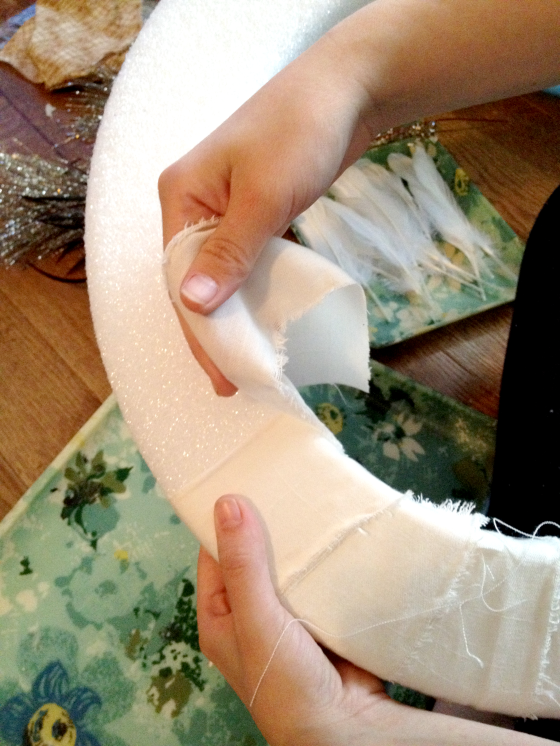
The first thing you’ll want to do is take your material and tear it into strips–set two strips aside to use during later steps. Tearing cotton fabric is super easy–just make a snip where you want to start and rip away! It helps make things straight without being too tedious. Take your fabric strips and wrap them around the piece of Styrofoam, hot gluing as you go.


After the Styrofoam is wrapped, start gluing the feathers around the circle. We started on the inside of the circle, moved to the outside, and then finished with the front, leaving the backside feather free. To make this step easier, be sure to glue each feather over the bottom half of the one before it.
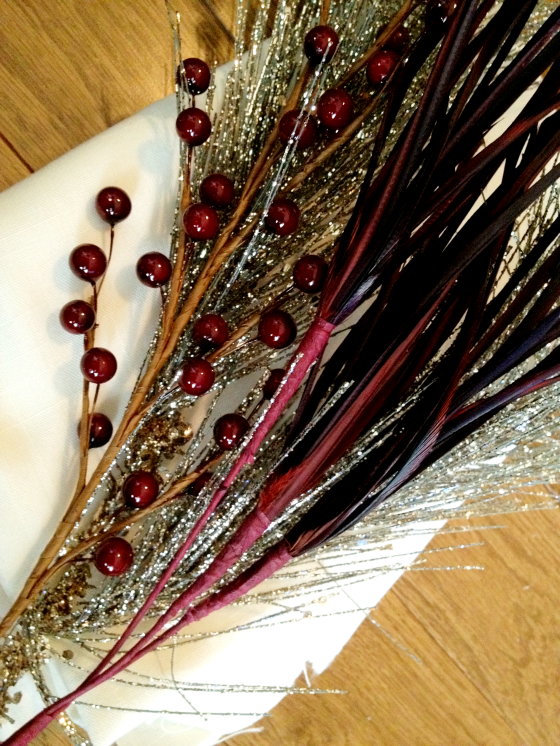
Next, take your accents and position them as you like. (Make a note of how you placed them because you”ll have to take them off for the next step!)

Take one of the strips of material you saved earlier and wrap it around the middle of the wreath and glue. We wrapped it around three times and then cut off the excess. This provides a base onto which your accents will be glued.
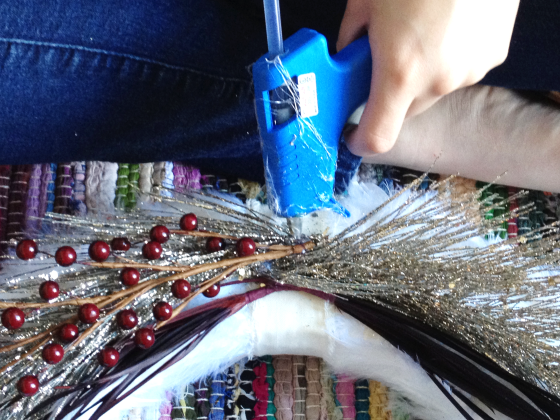
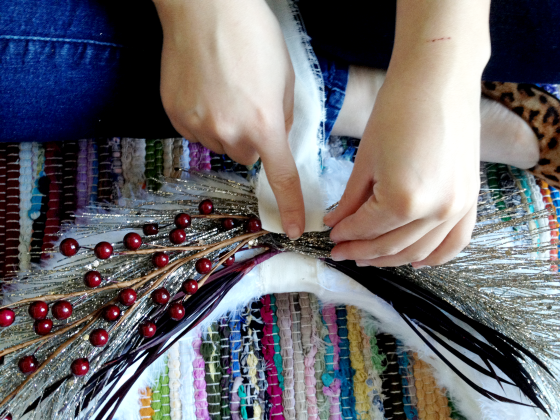
 Place your accents onto the strip of material. Rearrange and trim off any extras if need be then attach them onto the wreath with glue. Take your second strip and wrap around the ‘ends’ of the accents to cover them, gluing in this step also. Next, take your ribbon and glue it directly over the strip.
Because of the delicacy of our wreath we thought it best to hang it inside our apartment using only two command strips, but if you want to show off your fabulous wreath to the outside world then a door hanger would work best!
Happy Holidays!
Love, Bea